Scope Selector
The Scope Selector lets you quickly navigate and edit nested UI contexts in your application. When working with UserControls and DataTemplates, the Scope Selector helps you zoom into the specific part of the UI tree you want to design, rather than editing the entire page structure.
Understanding Scopes
In Hot Design, a scope is an editing context that represents a specific level of your UI hierarchy:
- Application Scope — Your main app or page (the starting point)
- UserControl Scope — When editing inside a
UserControl - DataTemplate Scope — When editing inside a
DataTemplateorDataTemplateSelector
For example, if your page contains a ListBox with a custom DataTemplate, you can:
- Edit your page in Application Scope
- Switch to DataTemplate Scope to design the content of each list item separately
- Return to Application Scope when finished
This keeps your design focused and prevents accidental changes to parent layouts.
Access the Scope Selector
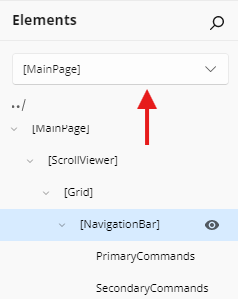
The Scope Selector appears in the Elements panel as a read-only textbox with a dropdown arrow.
Open the Scope Navigation Flyout
- Click the Scope Selector textbox or the dropdown arrow next to it.
- A flyout opens showing the Scope Tree — a hierarchical view, rooted at your application, of all available scopes (DataTemplates, DataTemplateSelectors, and UserControls) in your app.
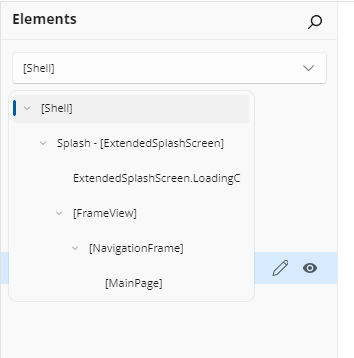
Where a template property is a DataTemplateSelector, a node for the selector property groups its individual template branches beneath it, so you can navigate to exactly the branch you want to design.
Navigate Scopes
Select a Scope from the Tree
In the Scope Navigation Flyout:
- Expand nodes by clicking the arrow next to them to reveal nested scopes.
- Click on any scope name to navigate into that editing context. Hot Design opens whatever editors are needed to reach it, and the Elements tree is rebuilt rooted at your choice.
- The scope tree automatically expands to show your current location.
Picking a DataTemplate scope commits on that first click — you do not need a second click or a focus change — and the flyout closes as the navigation gets under way.
The Selector Follows You
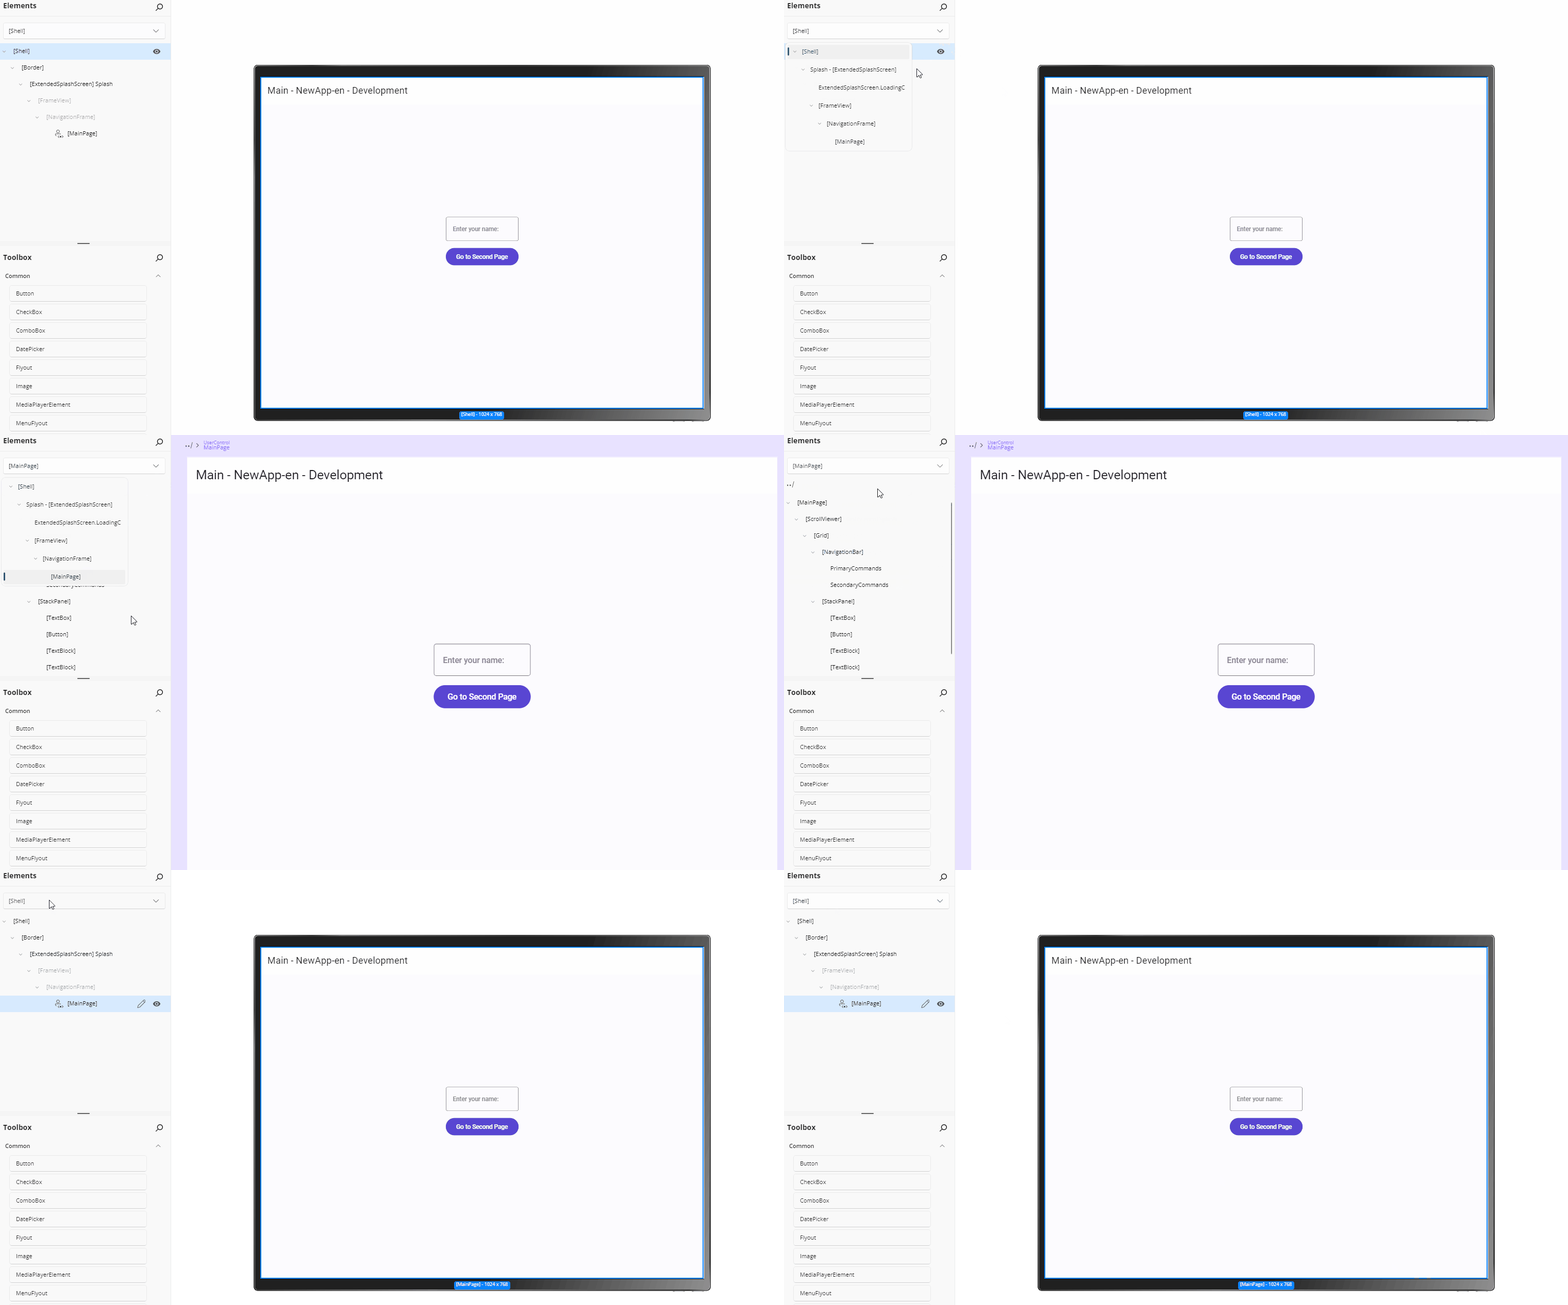
The Scope Selector stays in step with however you change scope. Double-clicking a UserControl on the canvas, or opening a template from the Properties panel, updates the selector's highlighted scope without re-triggering navigation. Where the active scope targets a collection item, the collection property scope is shown as selected instead.
If design-time data is not available for a scope you pick, no editor change happens and the selector reverts to the scope you were in — so the displayed scope and the surface you are looking at never disagree.
Current Scope Display
The Scope Selector textbox always shows your current scope. For example:
- Empty or
Application— You're editing the main page or app MyDataTemplate— You're inside a DataTemplate named "MyDataTemplate"ItemTemplate → ItemDetailsTemplate— You're in a nested scope (ItemDetailsTemplate inside ItemTemplate)
Design Within a Scope
Once you navigate into a scope:
- The Canvas shows only the content of that scope.
- The Elements panel displays the visual tree of that scope.
- The Properties panel lets you modify properties of elements within that scope.
- Any changes you make are reflected only within that scope's boundaries.
This focused editing prevents you from accidentally modifying the parent layout or other unrelated parts of your app.
Return to Parent Scope
To exit a scope and return to the parent context, use whichever is closest to hand:
- Open the Scope Selector flyout and click the parent scope in the tree.
- Click the
../back icon in the top-left corner of the Canvas or the Elements panel. - Double-click an area of the canvas outside the current scope's content.
You can continue navigating up until you reach Application Scope.
Leaving a scope restores the canvas settings of the context you return to — the page-level width, height, zoom, and auto-fit rather than the scope's own dimensions — and closing a UserControl editor refreshes every live instance of that UserControl, so your change shows up everywhere it is used.
Practical Use Cases
Editing List Item Templates
- Your page contains a
ListBoxwith a customDataTemplatefor each item. - Open Scope Selector and navigate to the ItemTemplate scope.
- Design the item layout (buttons, text, icons) in isolation.
- Return to Application Scope to adjust the ListBox size or properties.
Refining Complex DataTemplateSelectors
- When you have multiple
DataTemplateoptions in a selector, navigate to each template individually. - Edit each template's content without affecting others.
- Use the scope tree to switch between templates quickly during iteration.
Organizing Nested UserControls
- If your page contains multiple UserControls, navigate into each one to design its internals.
- Adjust layouts, colors, and bindings within each control in isolation.
- Return to the main page to verify how they work together.
Tips and Tricks
- Keyboard Navigation: Use arrow keys and Enter in the scope tree to navigate and select scopes.
- Auto-Expand Current: The tree automatically expands to highlight your current scope position.
- Quick Exit: Click the flyout background or press Escape to close the scope selector without changing context.
- Shortcut to a UserControl: With a
UserControlselected,Ctrl + Shift + U(Cmd + Shift + Uon macOS) enters its scope directly.
Note
A hierarchy root created in code rather than in XAML — a Frame set up in App.xaml.cs, say — is still tracked and highlighted by the selector, even though it has no XAML identity of its own and cannot be edited.
Related Topics
- Elements Panel — Manage your visual tree structure
- Properties Panel — Modify element properties within any scope
- Template Editor — Design a
DataTemplateonce you have navigated into it