Using the SamplesApp
The SamplesApp in Uno.UI is an Uno application containing a large number of UI and non-UI samples. It serves a few purposes:
- Allow for manually testing new features and investigating bugs,
- Provide UI for automated UI tests,
- Allow automated comparison of static snapshots between Uno versions,
- Document the functionality supported by Uno.
This article details how to run SamplesApp and how to add a new sample.
For instructions on working with automated UI tests, go here.
Running SamplesApp
The SamplesApp from latest master branch for WebAssembly is available online: https://aka.platform.uno/wasm-samples-app
To run the SamplesApp locally:
- Ensure your environment is configured for the platform you want to run on.
- Open Uno.UI with the correct target override and solution filter for the platform you want to run on.
- Select
SamplesAppas the startup app. This is a single multi-targeted head that covers every platform. - Pick the platform from the target framework dropdown next to the run button —
net10.0-desktop,net10.0-browserwasm,net10.0-android,net10.0-ios,net10.0-tvos, or thewindows10.0(WinUI) target. Select the target explicitly the first time:net10.0-browserwasmcomes first in the list, so it is what a fresh checkout defaults to. - If you're testing on a mobile platform, use a tablet if possible, as the app is optimized for a tablet layout.
- Run SamplesApp.
Note
SamplesApp needs no bootstrap step. It imports the in-repo Uno.Sdk directly from src/Uno.Sdk by path, so the project loads and builds straight from a fresh clone without packing anything into a local NuGet feed first.
If everything builds successfully, the app will run. The app is a collection of samples, grouped into categories. You can navigate to a sample using the menu on the left.
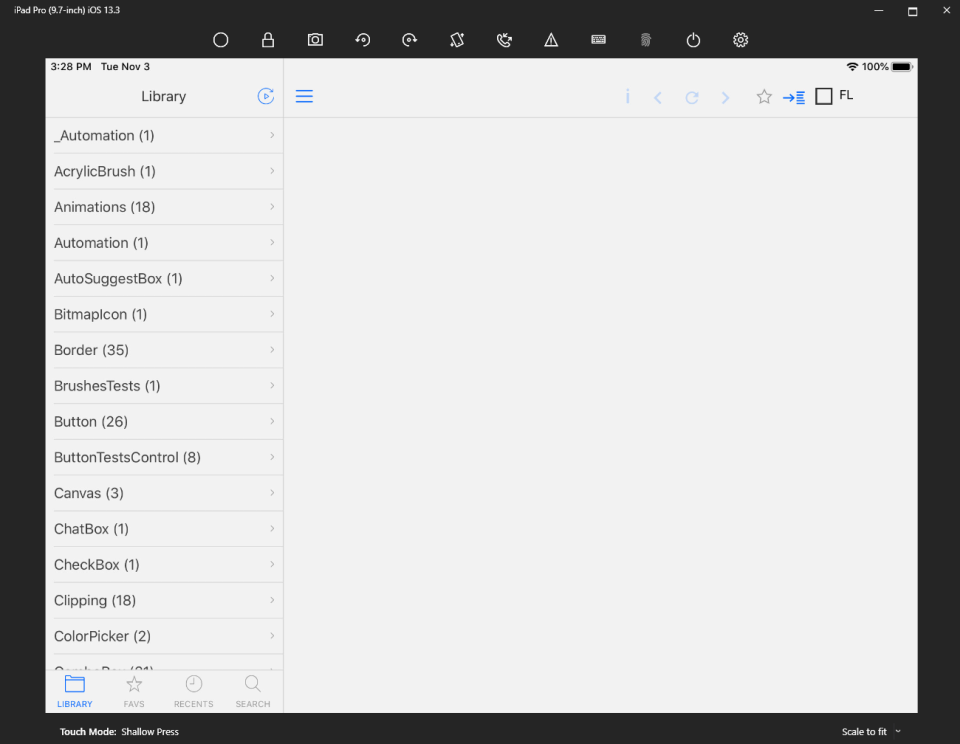
Running-debugging the WebAssembly app on a mobile device
By default, SamplesApp starts in debugging mode on localhost, making it inaccessible from external devices, even if they are on the same network. To remedy this, you can utilize Visual Studio Dev Tunnels to establish an externally accessible URL for your application. For more details, refer to the Microsoft Learn documentation. If the option doesn't appear initially, consider running a rebuild of the SamplesApp.Wasm project.
Sample organization
Samples are located in the SamplesApp.Samples folder. UI-related samples are generally grouped by control, or by functional area for samples that aren't specific to a particular control (eg VisualStateTests). Non-UI samples are generally grouped by namespace of the tested feature.
Note that there's no 'master list' of samples. Instead, individual samples are tagged with SampleAttribute, and the SamplesApp automatically picks up all samples using the attribute.
SampleAttribute
SampleAttribute accepts one or more optional categories, as well as an optional Name and Description, and a ViewModelType property which can be used to set a Type which will be instantiated and used as the DataContext of the sample control. If a category and/or a name aren't explicitly set, then the sample name and category will be automatically determined from the class name and the last part of the namespace.
Examples:
In the first example, no parameters are supplied to the Sample attribute. The sample will be included under the name ToolTip_Long_Text, in the ToolTip category.
namespace UITests.Windows_UI_Xaml_Controls.ToolTip
{
 [Sample]
 public sealed partial class ToolTip_Long_Text : UserControl
In the second example, the category and name are manually specified, and a view-model type is specified to use as the DataContext of the sample.
namespace UITests.Windows_Devices.Haptics
{
 [Sample("Windows.Devices", Name = "Haptics.VibrationDevice", ViewModelType = typeof(VibrationDeviceTestsViewModel))]
 public sealed partial class VibrationDeviceTests : Page
Adding a new sample
To add a new sample to the SamplesApp:
- Locate the folder corresponding to the control or class you want to create a sample for in
src/SamplesApp/SamplesApp.Samples/. Folders form a nested hierarchy mirroring the API namespace — the same layout assrc/Uno.UI— so aButtonsample lives underWindows/UI/Xaml/Controls/Button/. Note that the C# namespaces still use the older underscore form (UITests.Shared.Windows_UI_Xaml_Controls.Button), so copy the namespace from a neighboring sample rather than deriving it from the folder path. - Create a new
UserControlfrom the Visual Studio templates, with a meaningful name. - Add your sample UI to the
UserControl. - Add the
[Uno.UI.Samples.Controls.Sample]attribute to the class in the code-behind partial file. The XAML and code-behind are picked up automatically — no project registration required. - Format your XAML file:
dotnet xstyler -f src/SamplesApp/SamplesApp.Samples/YourFolder/YourSample.xaml(requiresdotnet tool restorefirst, see Code style). - Double-check that the category name matches other samples for the control.
- Run the
SamplesAppto check that your sample appears in the browser and works as expected.
Adding a manual test sample
Some tests cannot be validated automatically, and need to be flagged with the IsManualTest property on SampleAttribute. These tests will be filtered in the Samples App to be validated by a human.
The content of those tests must describe a scenario to follow, what to expect, and which exceptional conditions may need to be validated. If the result is visual, an image or video resource file may be needed as well.
Sample snapshots on the CI
Each CI build of Uno.UI records screenshots of each sample in the SamplesApp. A diff tool details screenshots that have changed from the previous master build, allowing unexpected changes in the visual output to be caught.
The snapshots are taken during the CI, in a specific job running under Linux. They are located in the Unit Tests section under Screenshots Compare Test Run as well as in the build artifact.
Validating the WebAssembly UI Tests results
In the CI build, an artifact named wasm-uitests is generated and contains an HTML file that shows all the differences
for screenshots taken for the past builds. Download this artifact and open the html file to determine if any screenshots
have changed.
Creating performance benchmarks with BenchmarkDotNet
Performance is measured using BenchmarkDotNet, in the suite located in the SamplesApp.Benchmarks shared project.
A few points to consider when adding benchmarks:
- Make a folder using the namespace separated by
_ - Avoid putting a large number of benchmarks in a single class. Those tests are run synchronously under WebAssembly, and this will allow for progress reporting to be visible.